When using the automated time periods, no date is visible within the filter selections. We recommend that you add in a time stamp to give your report context to the relevant calendar time as it rolls over with each refresh.
Follow these steps to add in a time stamp to your report:
- Start with your report which uses the calendar and relative period to create an automated time period (xx click link to on how to use automated time periods).
This may look something like this: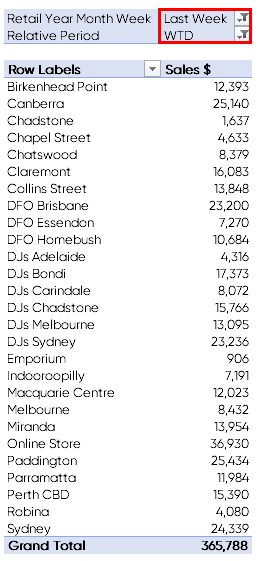
- add another tab in your report and call it "ref tab"
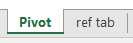
- set up another pivot using the same relative period selection used in the original report pivot

- go to Calendar | more fields

- select the 'more fields' options you'd like to include in your report
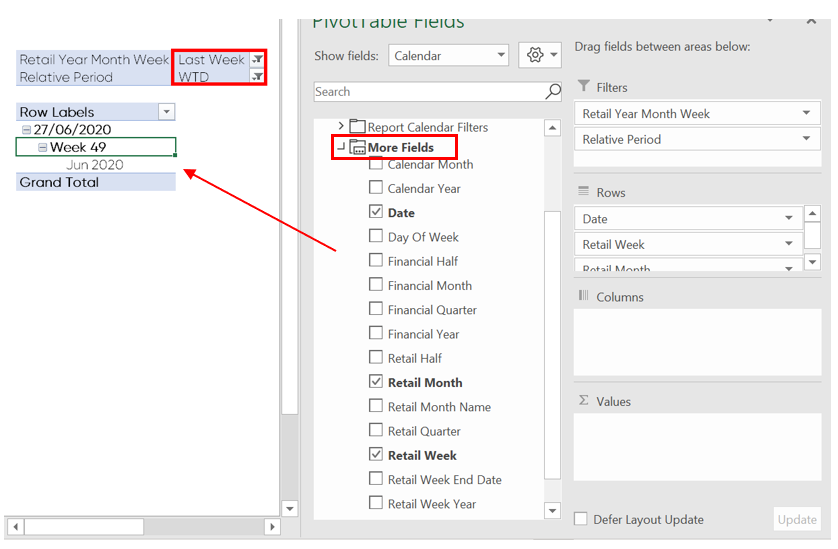
- Link the desired fields into the report through a concatenation formula to date stamp the report when it is refreshed.
- you may then choose to hide the 'ref tab' tab
- ensure you 'Refresh All' to ensure all connections are refreshed in the case that the ref tab connection is different to the report connection.
See xx video link for demonstration on how to date stamp your report