Accessing tRS Connect
Stores will log into their store portal from their POS PC.
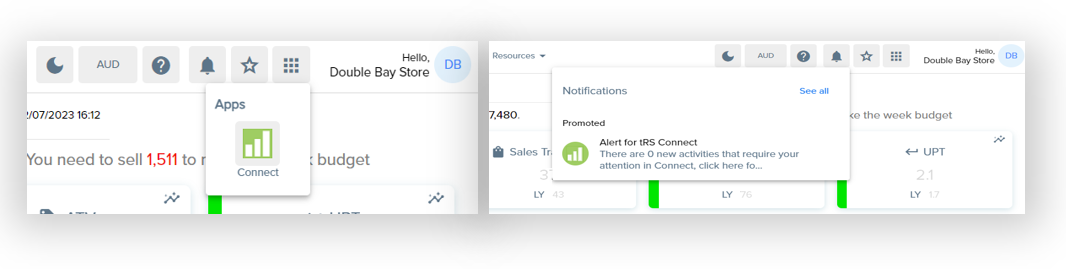
There are two ways stores will access their compliance platform: tRS Connect
1. From the app menu icon on the top ribbon and clicking on the connect icon. or
2. via the alert notification that outlines the number of new activities assigned to that store.
tRS Connect Store Dashboard
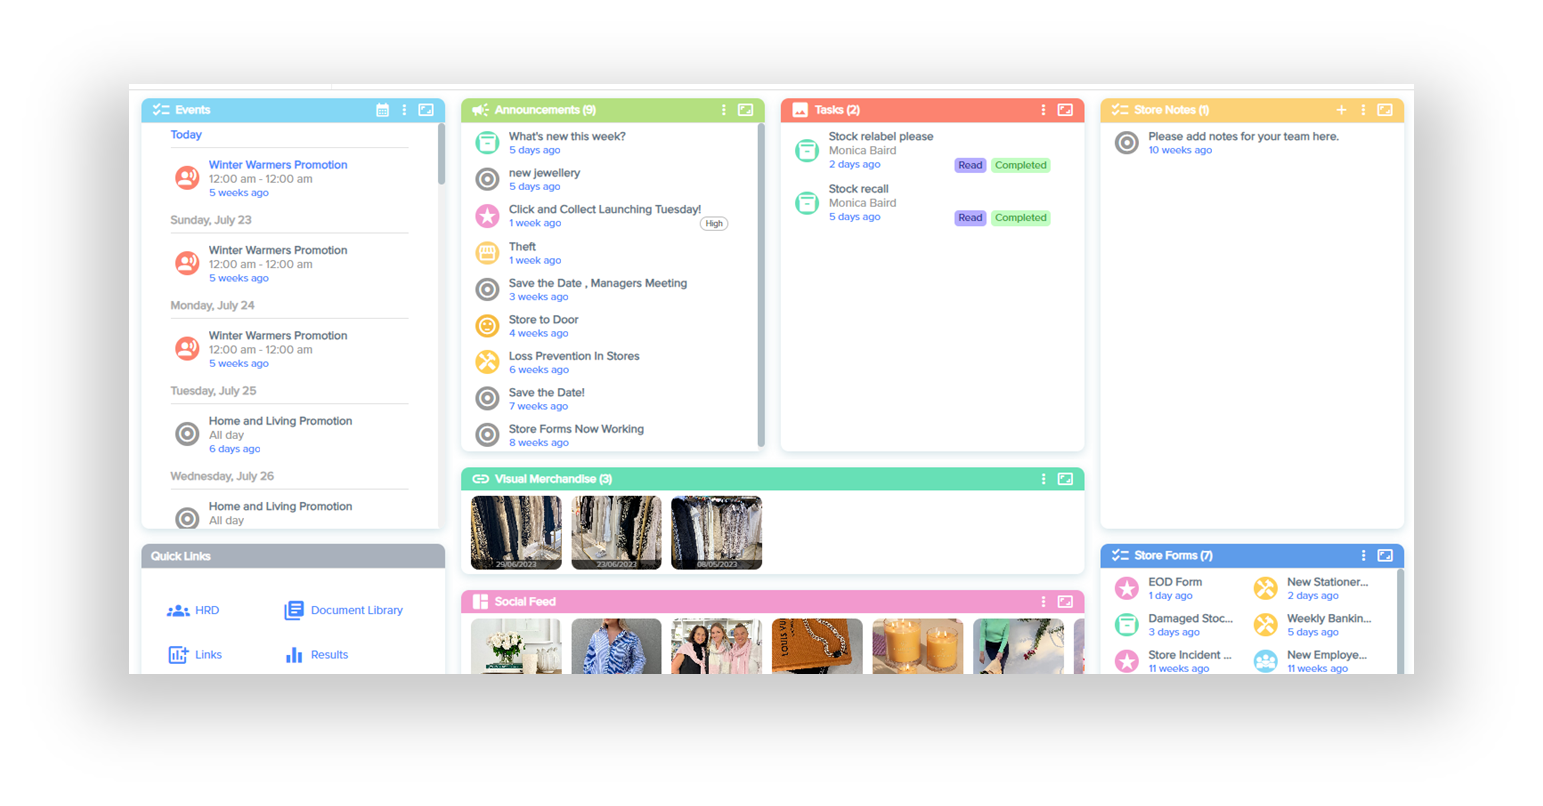
The central dashboard for tRS Connect displays 8 tiles;
- Events
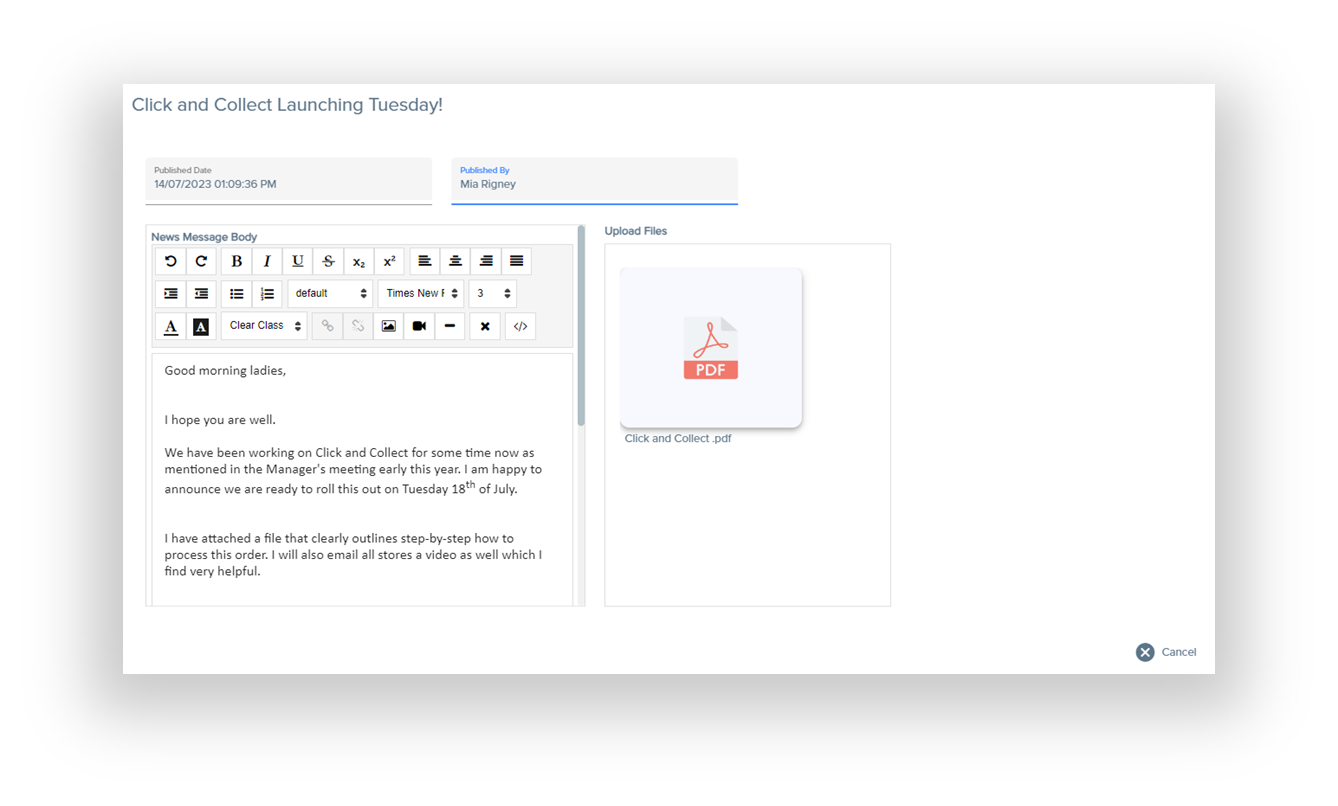
- Announcements
- Tasks
- Store Notes
- Quick Links
- Visual Merchandise Directives
- Social Media Feeds
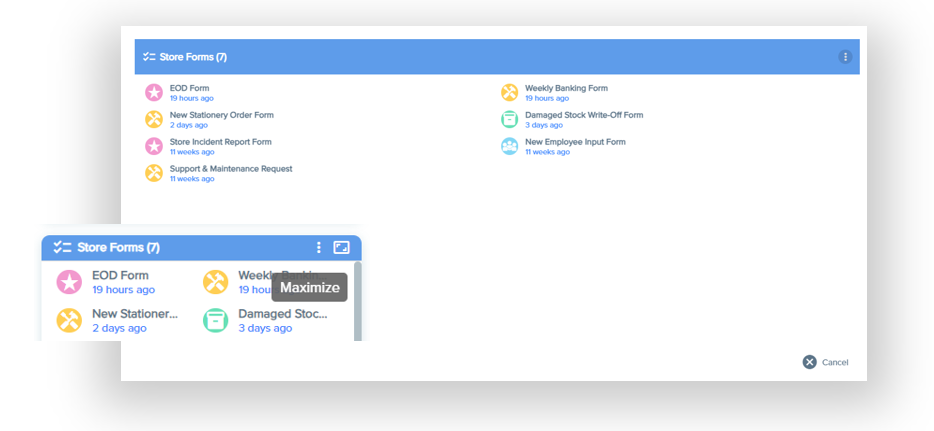
- Store Forms
tRS Connect Store Features
The key tiles have several menu options in the top ribbon:
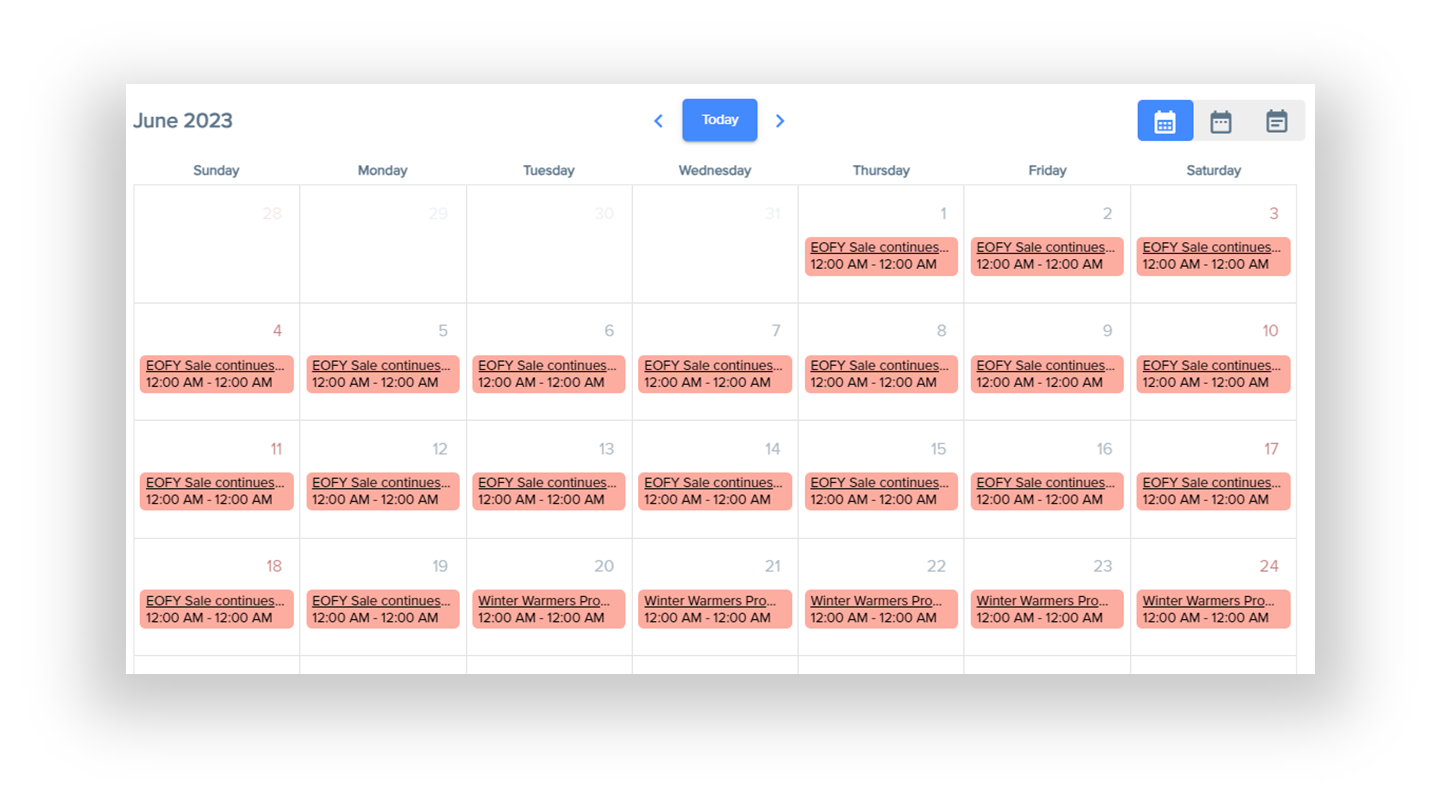
- Views (Events Only)
- Month View
- Week View
- Day View
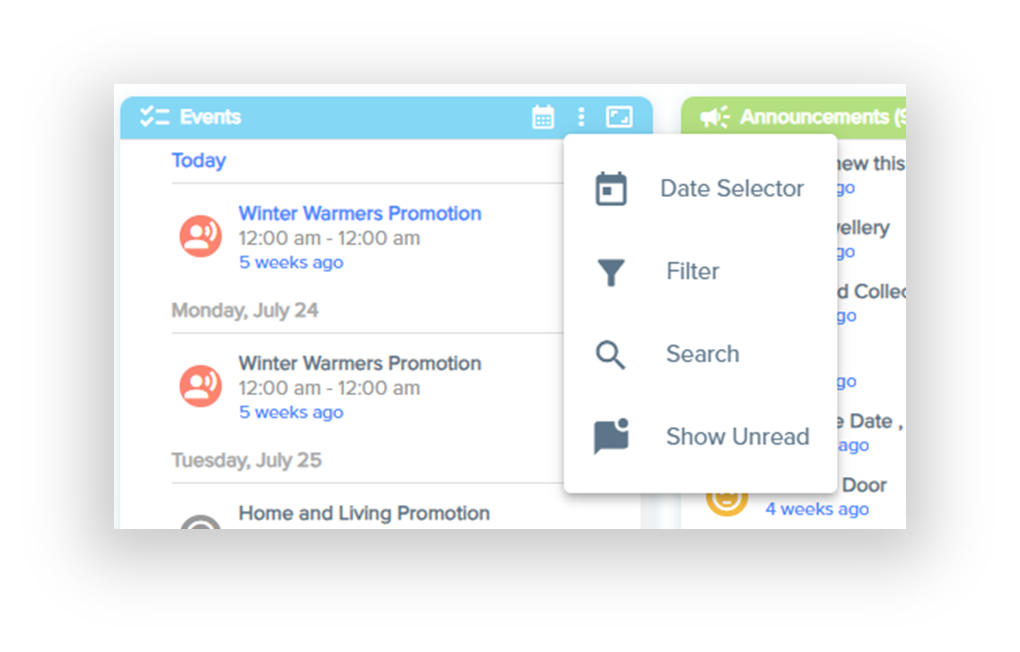
- Three dot vertical options
- Date Selector (Events Only)
- Filter - ability to use the Primary or Secondary Tag or Status to filter the list
- Search - provides the ability to search on a key word
- Show Unread
- Add New (Store Notes Only)
- Expand tile
- Pops the tile out as a new window in large screen view.
- Activity Detail
- Each actvity can be clicked on to see more details and or respond to more requests.
- Once the activity has been clicked, it will be recorded as READ
- Once the request has been filled in and submitted, it will be recorded as COMPLETE
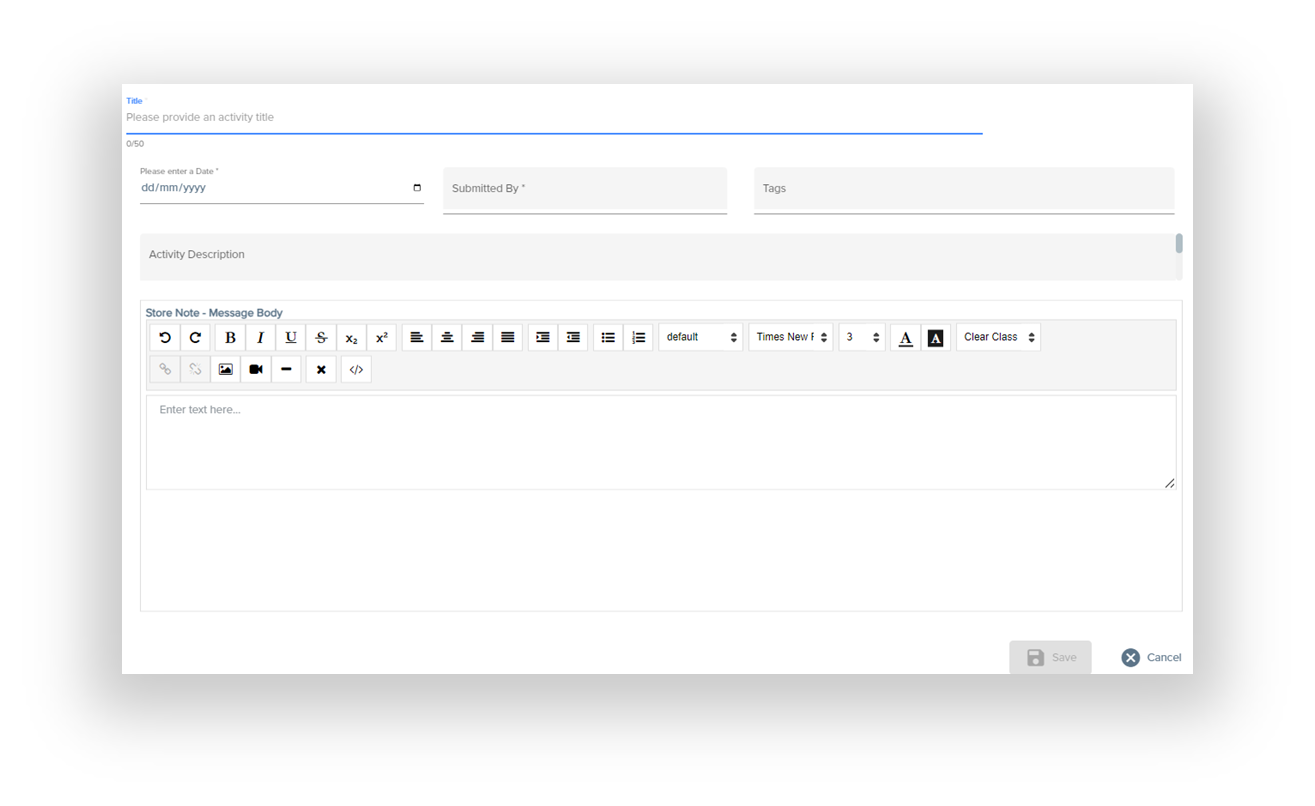
Create a new Store Note
1) Click on the [ + ] icon from the top ribbon of Store Notes

2) Choose a template to use for your store note
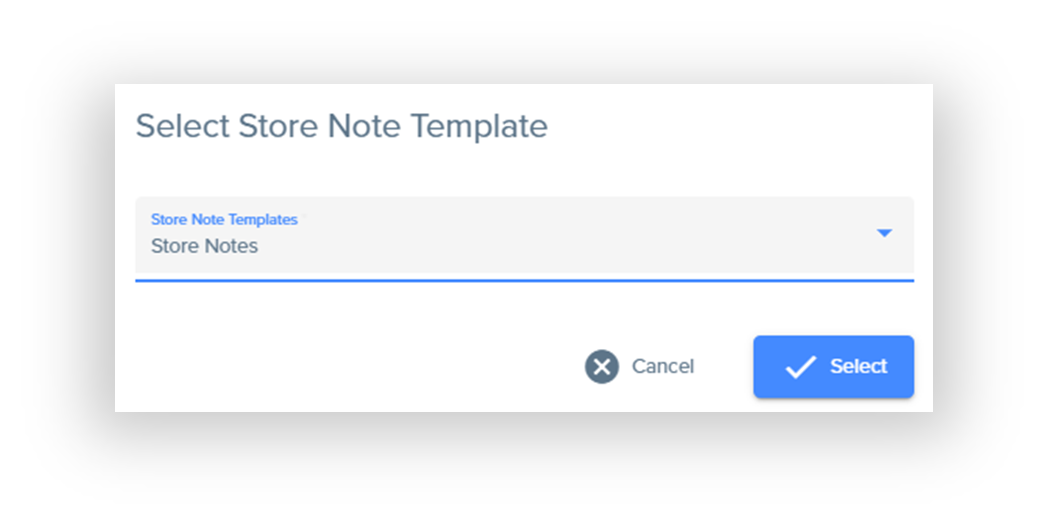
3) Fill in the form to publish to the store notes area for your team members