Introduction
The Budget Daily Splits file is an upload to the admin portal which is used to split the Weekly Sales Budget down to a daily % so that we can run Week to Date (WTD) and Daily Sales comparisons to Budget.
This file will require
- A Locations budget by week and a split % of the week for each location by day.
- A connection to your tRS cube.
The Daily Split budget file is loaded by Retail Week and Location against the Day of the week (1-7)
To check which day aligns with 1-7 you can check your cube, using [Retail Calendar] and [Day of Week]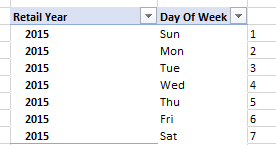
Like all data uploads, the master file needs to be downloaded, updated and re-loaded.
It can be loaded as needed or loaded upfront for the next Financial Year.
Setting up your Splits File

Firstly we need to populate the reference cells (A-D)
The Key
The key is a fixed value,
- Select the Key from the cell drop-down box - this cannot be changed
Fiscal Week SK
Populated as a text string, using the format of YYYYWW
Week being 01-53
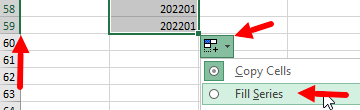
Note - To quickly fill out a 52 week period,
- Type 202201 in cell B8
- Drag this number down to cell 59]
- Select the Auto Fill Options and Fill as Series
To populate new yearly strings simple copy and paste, or make cell 60 = cell 8 and fill to desired number of locations. (remember to paste as value for any formulas applied)
Location Code + Location Name

- Copy and paste the code and name as values into cells C and D and populate alongside your Fiscal weeks for each store.
The budget file should look something like this, with all cells filled.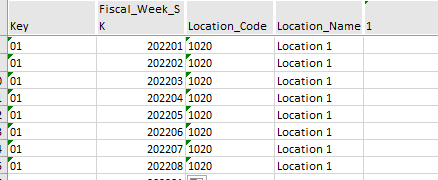
Cells 1-6
These should be a % of the weekly budget that is to be applied to each day of the location.
The % is represented as a decimal number of this %.
The decimal place needs to be no longer then 3 decimal places.
(=Round,cell,3) will ensure all cells are rounded to 3 decimal places.
(remember to paste as values for any formulas applied)
Cell 7
To ensure that the row = 100% of the weekly split. We use the following formula.
- =1-SUM(cell1:cell6)
- Copy this down to your last value.
- Copy and paste the entire column as values.
Once the file is complete, upload it to the admin portal and run the job manager to refresh this file into your cube.
Trouble Shooting
The numbers do not = 1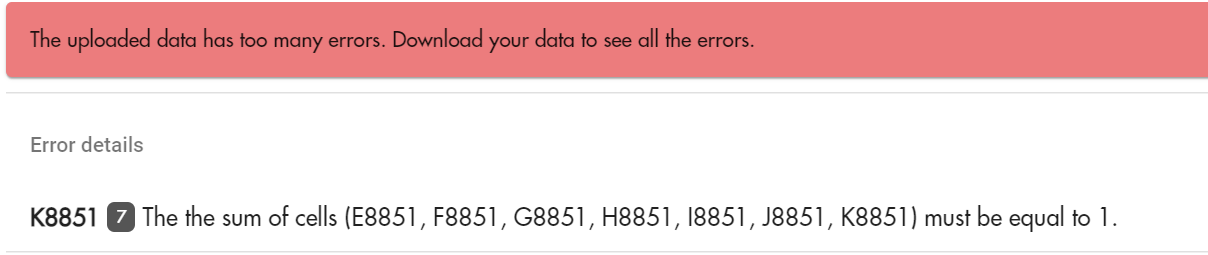
One of the most common upload errors is "the cells must = 1" (aka 100%)
this is most commonly due to the final column K still being the formula =1-Sum(E8:J8)
To resolve this, simply copy(ctrl V) and (right-click paste as values) the entire column from K8 down. This will convert it to a working number.
The numbers will not sum?
Check that the numbers are formatted as numbers
To remove the green arrow and convert back to a number
- Highlight all Numbers, and in the top left of the first cell, you should see an exclamation mark !
- Click this and convert to number
