What is the Account Master File?
The Account Master File is an excel spreadsheet that lists out the account codes with additional columns to add attributes that support reporting, mapping and financial calculations.
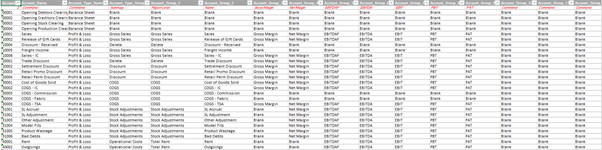
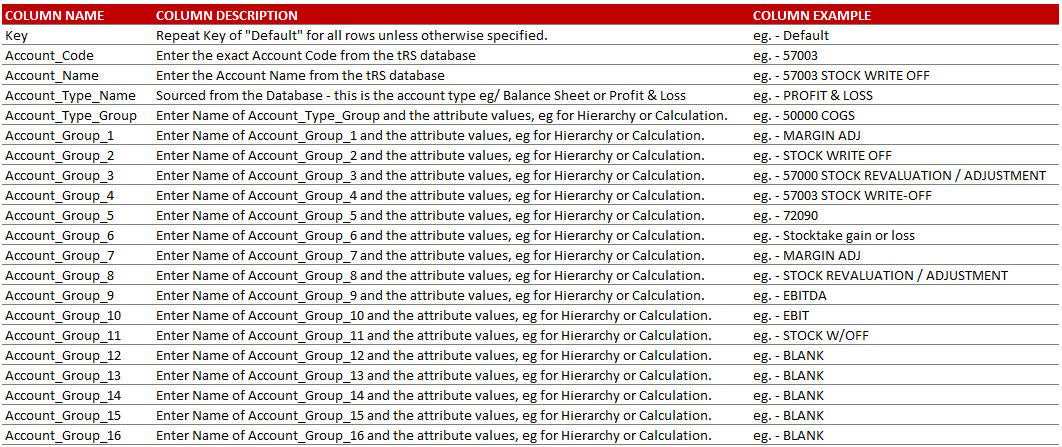
- It contains the Account Coce, Account Name and Account Type
(typically Profit and Loss or PL vs Balance Sheet or BS) - And upto 16 columns for additional attribution
- It is loaded into your data warehouse via the Admin Console
- And appears in your data warehouse under GL Accounts Folder
- Is located in your tRS Admin Console and is maintained by the retailers finance team
A sample is illustrated below:
Why is the Account Master File important?
The Account Master File is incredibly important to the accuracy and usability of the GL Module.
- Is used to define the drill path or hierarchies used in reporting
- Is used to define what account codes are included in financial calculations
eg/ Occupancy Expense - Is used to define the inclusion into a specific report and the sort order it should appear.
Please note
Changes to your Account Master will impact your Financial Calculations and Report Views.
How can the Account Master File be maintained?
When new accounts are created, an email will be generated to the notification email set up for the Retail Score service alerting them that new accounts have been added and need to be mapped.
Follow these steps to keep your Account Master File upto date
1. Log into your portal and click on the spanner icon on the top ribbon
2. Navigate to the Upload Files and General Ledger Area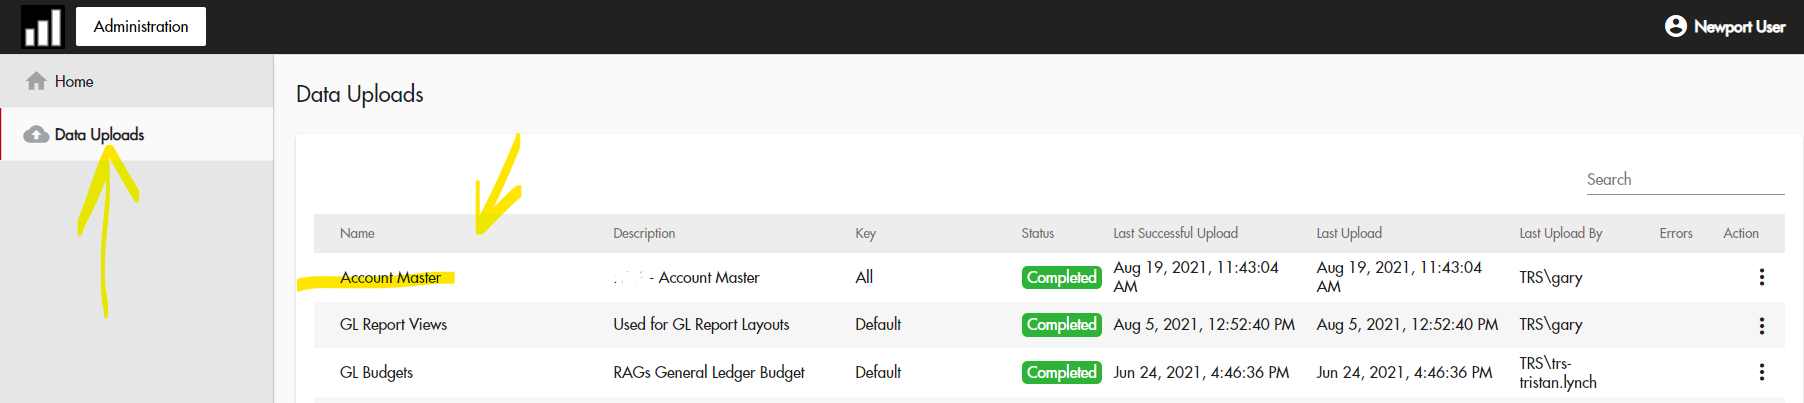
3. Click on the vertical three dots and download the last successful upload
4. Save the file for back up just in case you need to refer to it again
5. Add new Account Codes and fill in the required fields
Tip: It might be quicker to filter on the table to show "like" account codes that share the same attributes and copy and paste their attributes for the new account codes.
6. Save As a new name
7. Go back to the Admin portal and click on the three vertical dots and select upload file
8. Browse and upload the new file and wait for a success notification.
9,. Follow the steps if an error during upload occurs or contact support@theretailscore.com