What do store users see when they log in?
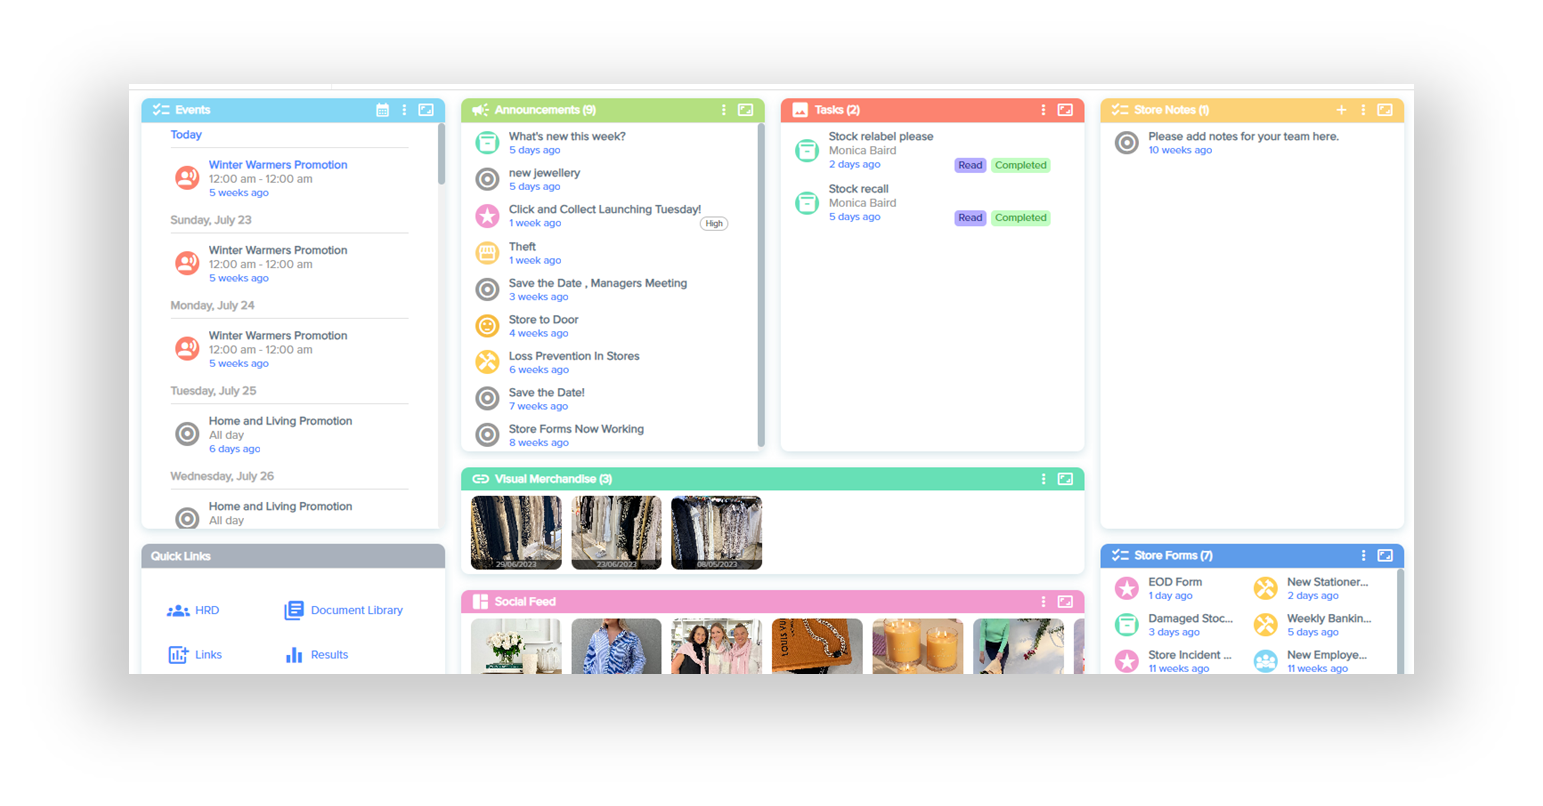
The central dashboard for tRS Connect displays 8 tiles;
- Events
- Announcements
- Tasks
- Store Notes
- Quick Links
- Visual Merchandise Directives
- Social Media Feeds
- Store Forms
How do I know if there are new activities for me to action?
When you log in to your Portal, you will see a notification in the top right corner of your screen like this.

This indicates that Head Office has published a certain number of activities to your store.
Click on the notification, or open Connect, and you will be taken to the Dashboard (shown above). Here you will be able to see all activities that have been pushed to your store by Head Office. Tiles that contain new activities will have a red circle with a number indicating how many new activities are in that tile.

How do I see more details about an activity?
On your dashboard, you can see many different types of activities that have been sent to your store, under the eight tiles shown at the top of this page.
To see more details about any of these activities, click on the activity. We will use the example of this Task.
This will open a popup window, with details about that activity. The popup window will vary depending on the type of activity you are viewing. Below is an example of a popup window for a task.
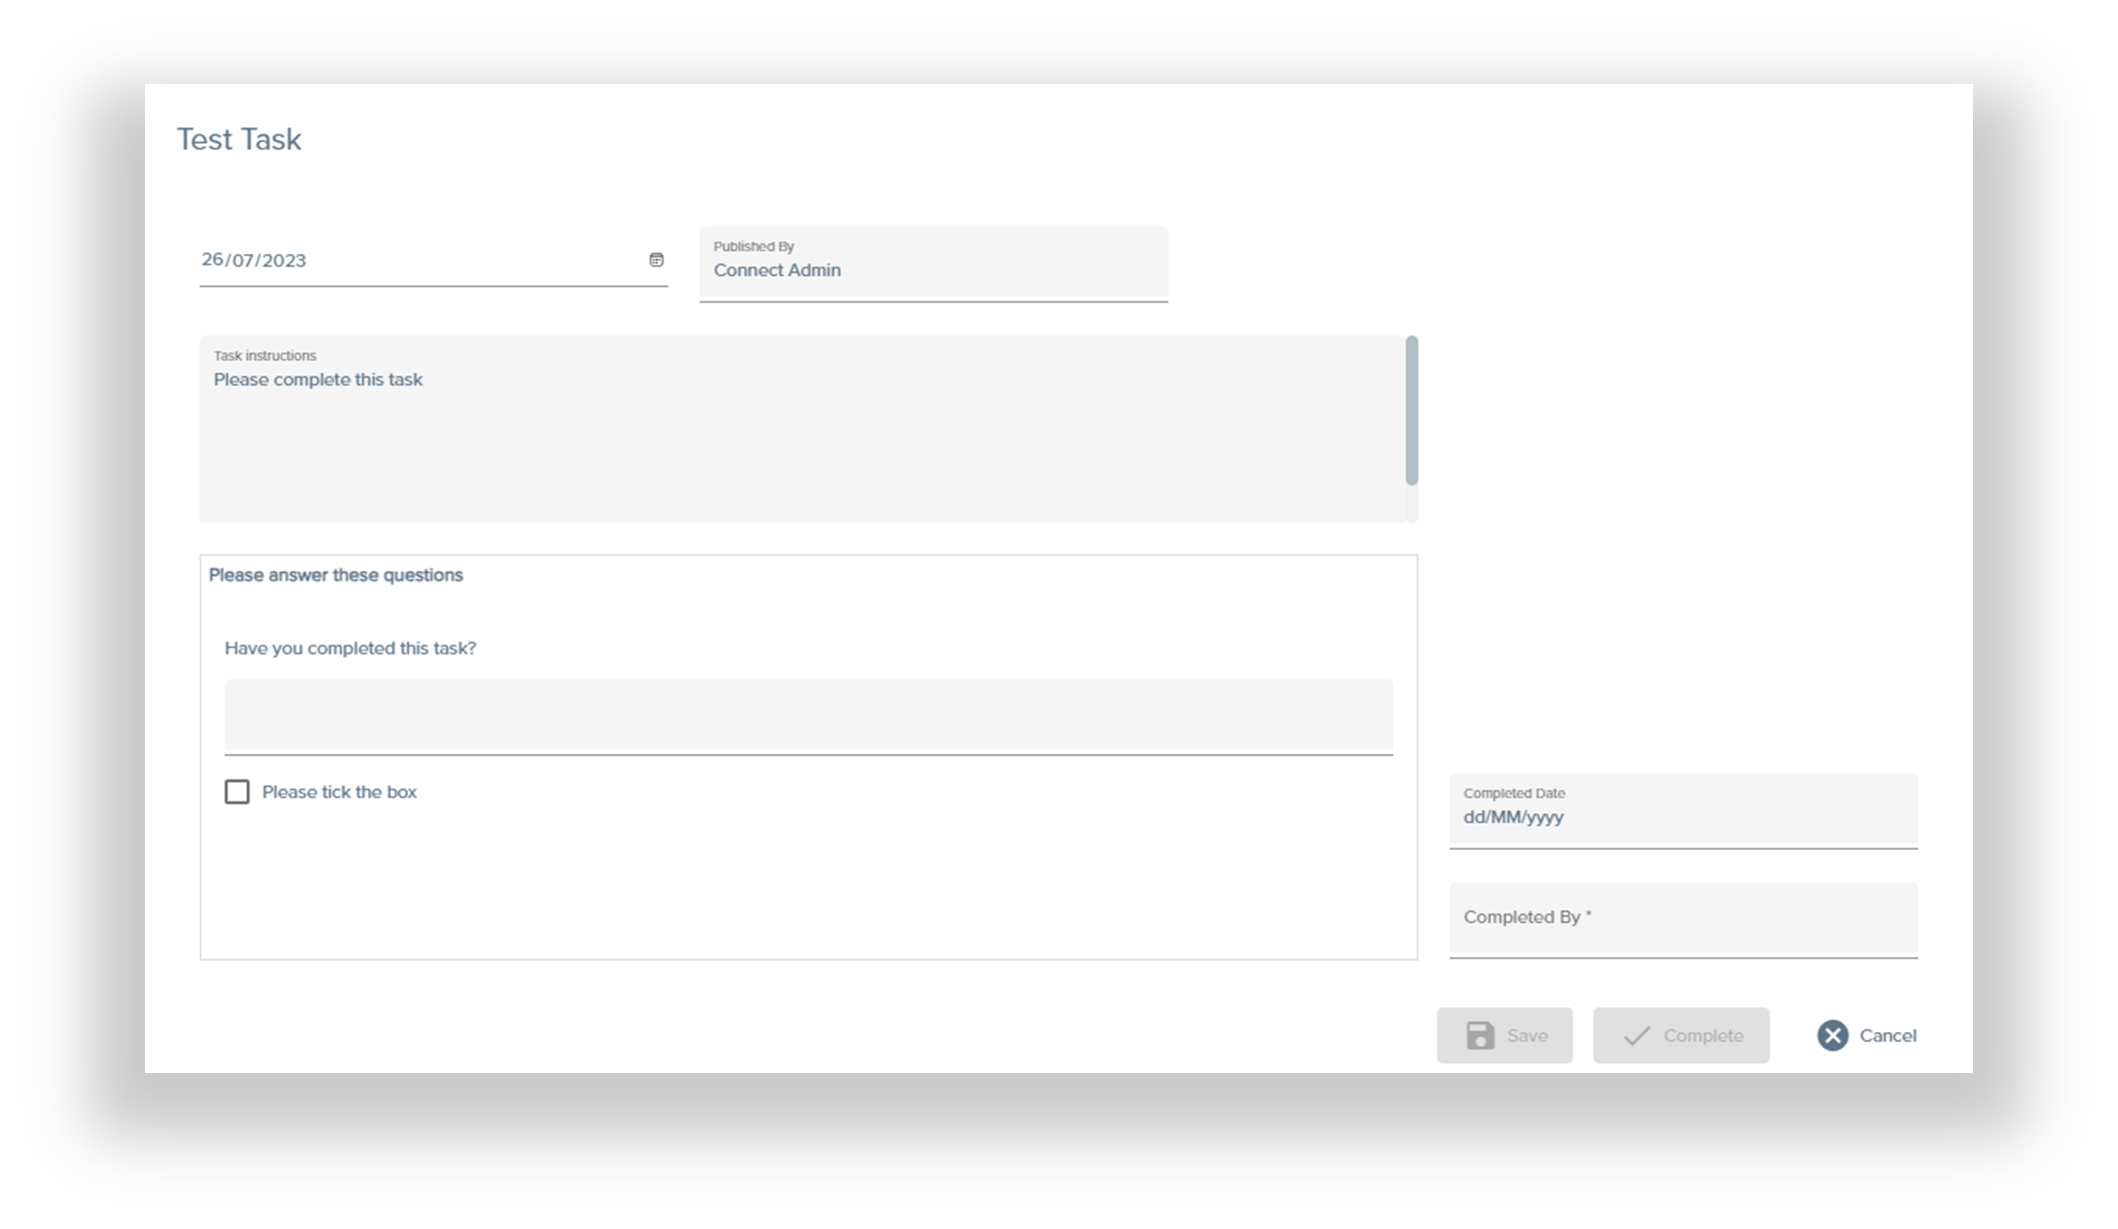
Here you may view the details, then close the popup window by clicking cancel, or you can action the activity.
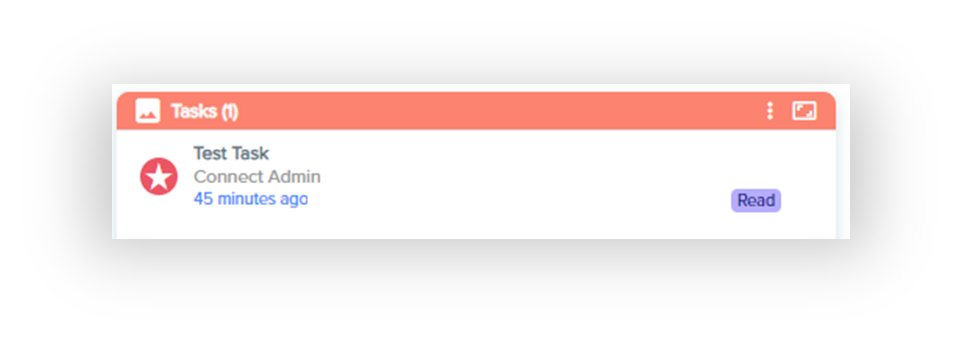
After clicking cancel, you can see that the status has changed from "Unread" to "Read", informing your Store and Head Office that this activity has been read. The number in the red circle on the tile will also decrease by one, or disappear if this was the only new activity in this tile.
How do I complete a survey?
In the bottom right corner of the screen is the tile called Store Forms.

This contains all the regular or ad-hoc surveys Head Office has published to your Store to complete. Click on the survey you would like to complete, and you will be taken to a popup window with the description and questions for that survey.
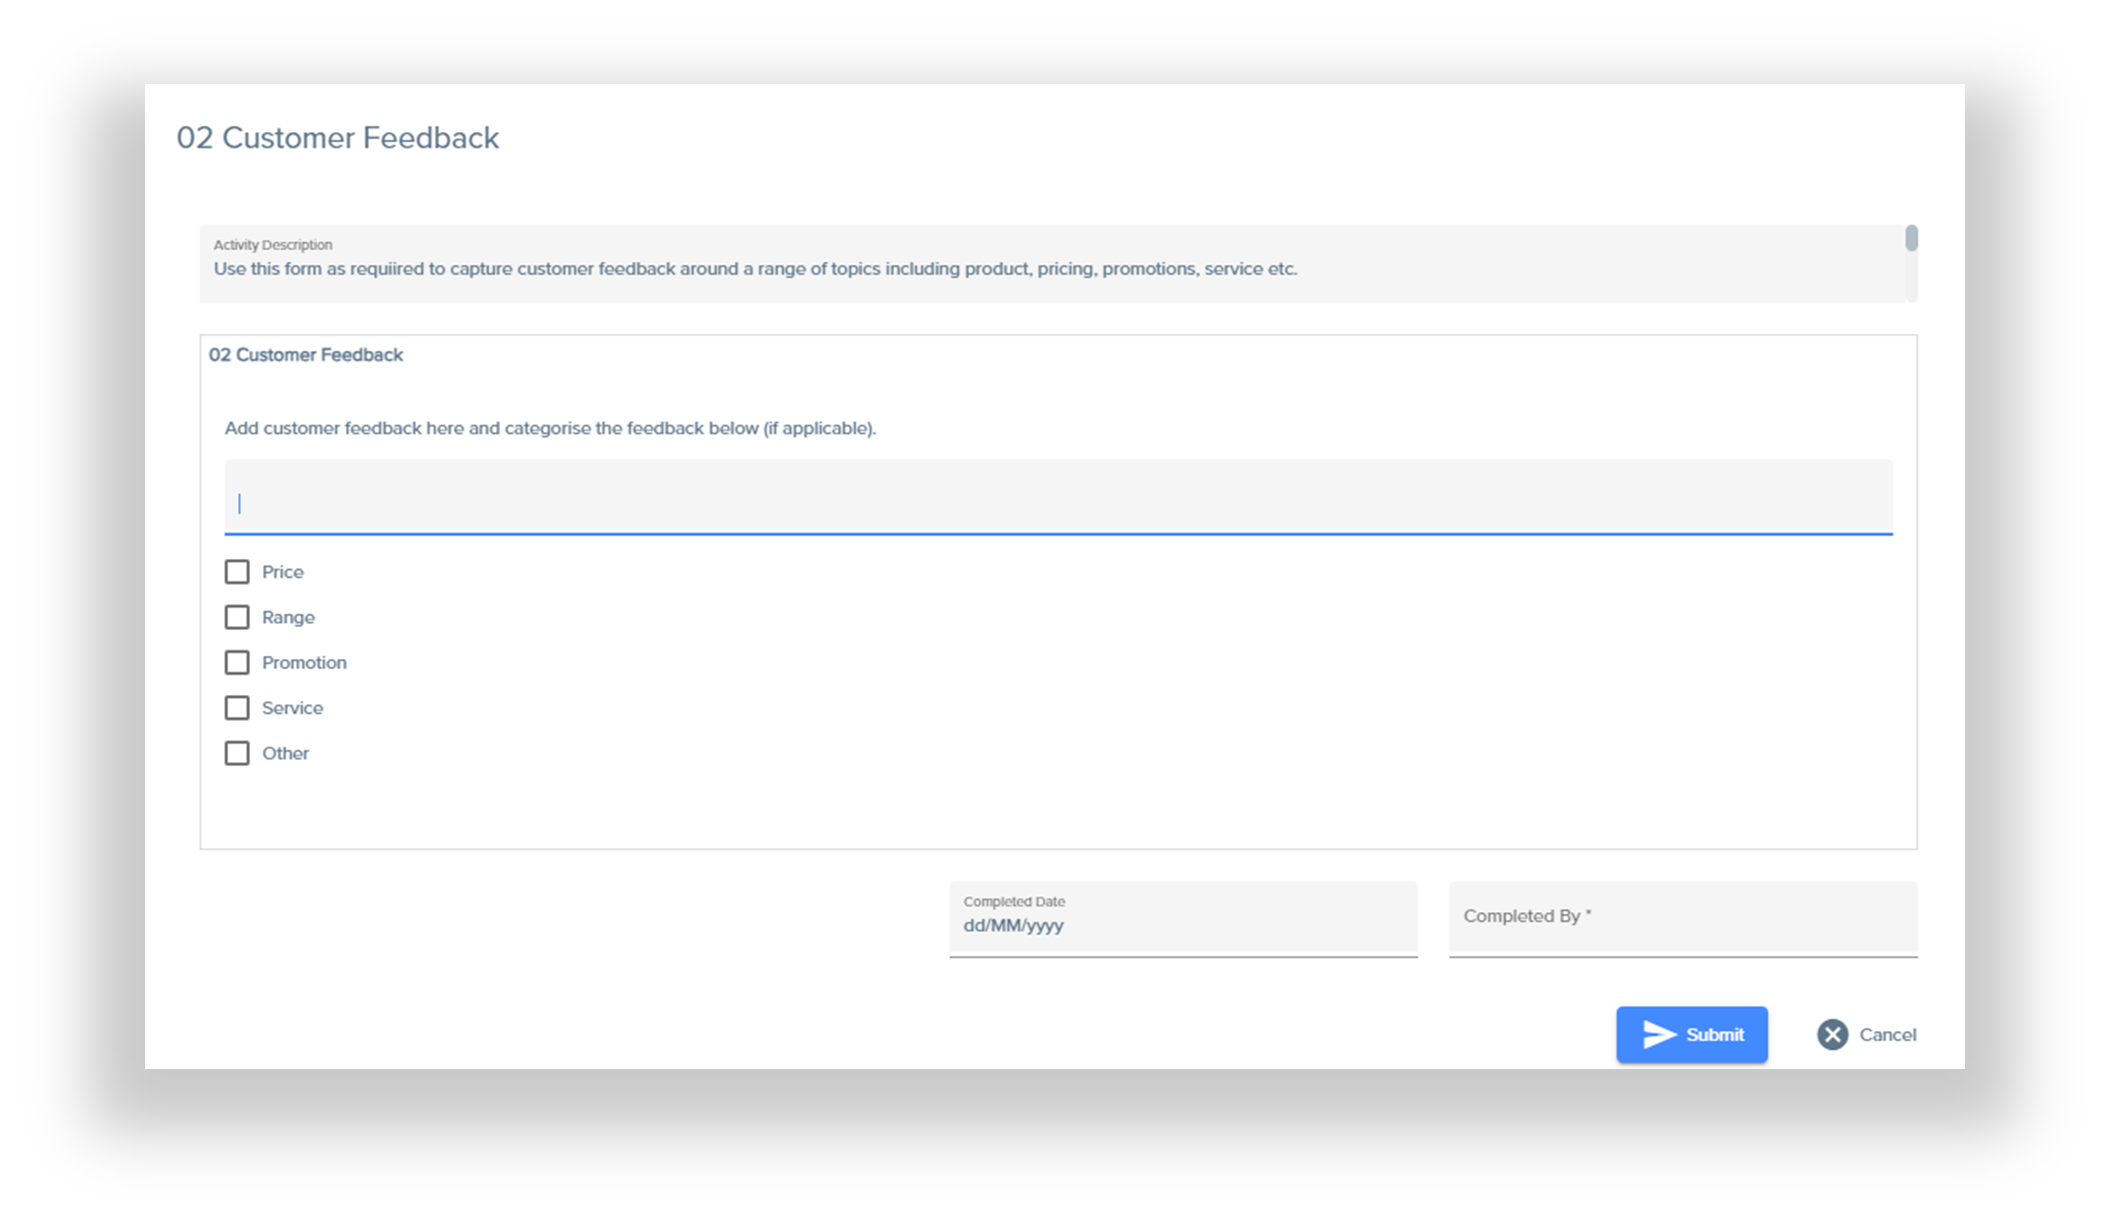
Answer the questions in the centre box and enter who the survey was completed by in the "Completed By" field in the bottom right corner of the popup window.
Then click submit, and your survey will be sent to Head Office.
How do I complete a task?
Click on the task you would like to complete, and you will be taken to a popup window. Address the Task Instructions, then answer the questions in the box and enter who the task was completed by in the "Completed By" field in the bottom right corner.
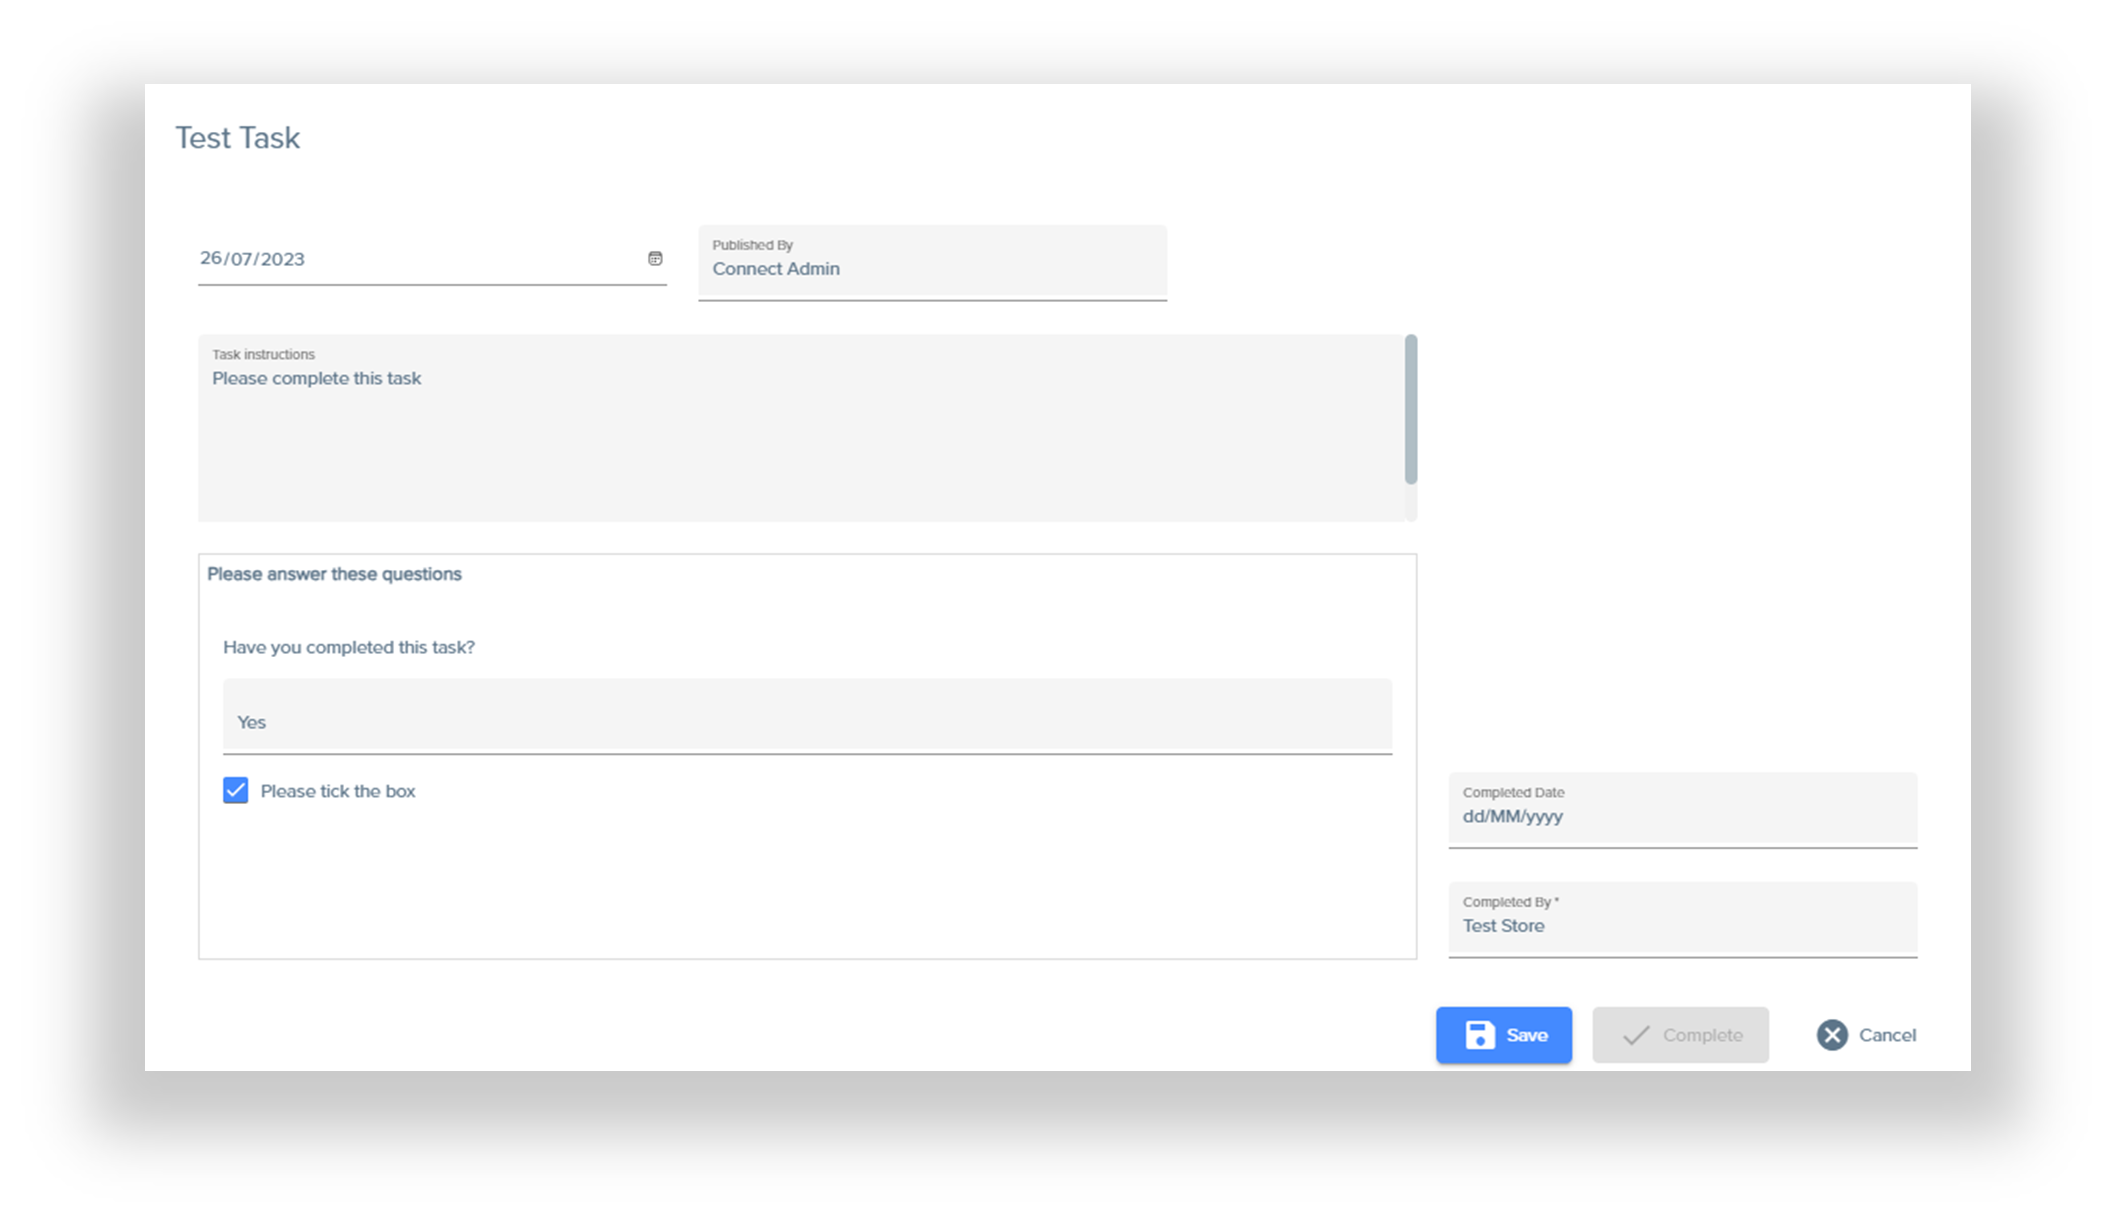
Click Save to save your responses, then Complete to submit your responses to Head Office.
Once you have completed the Task, it will show in your dashboard as completed.

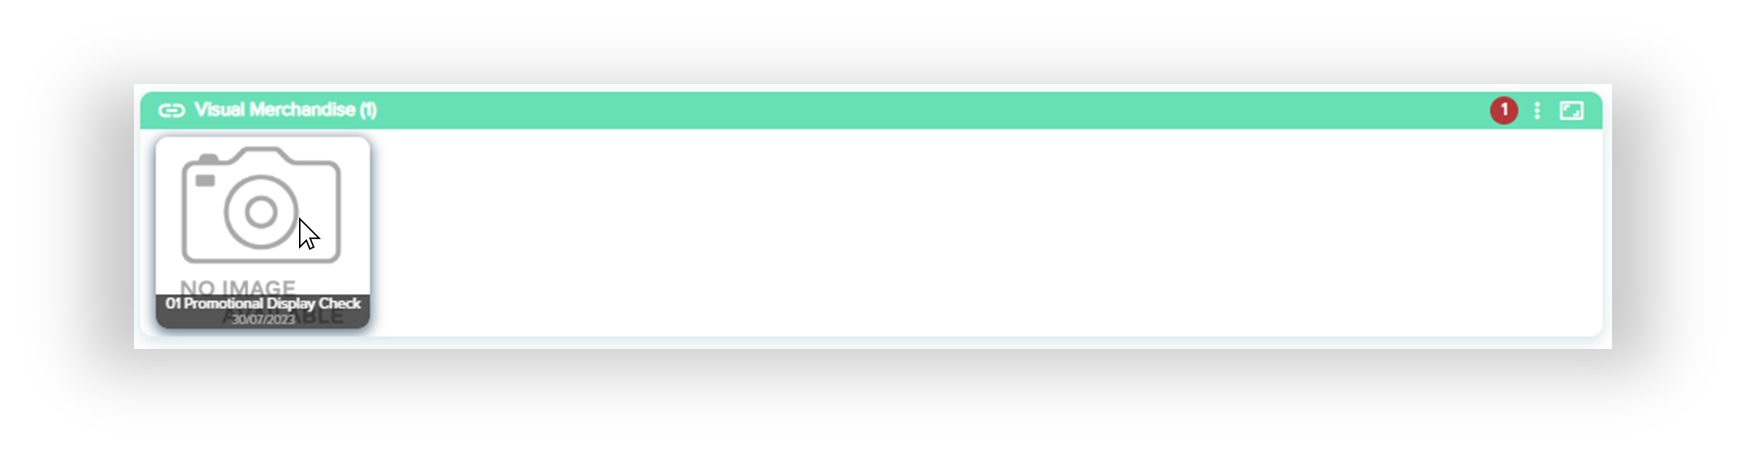
How do I submit a visual merchandise directive?
Click on the Visual Merchandise Directive you would like to submit from the Visual Merchandise tile on your Dashboard.
This will take you to a popup window with the details of the Visual Merchandising Directive.
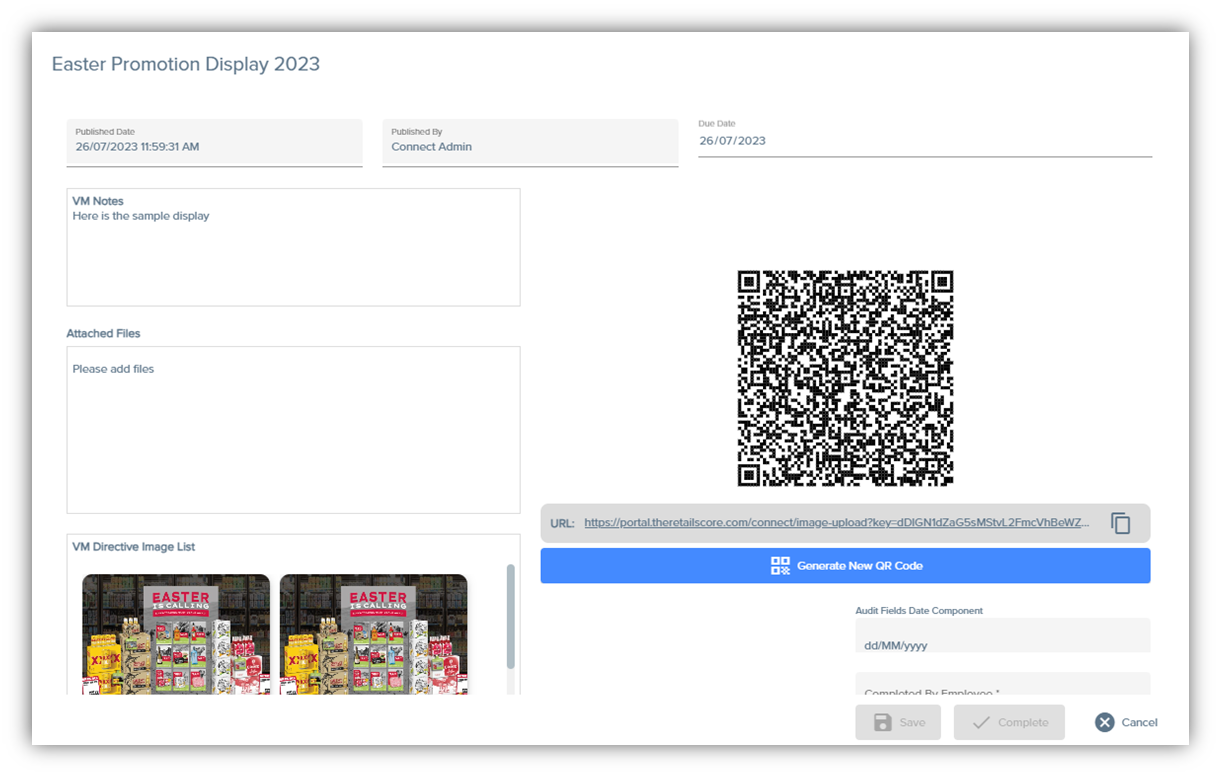
After reading the directive, and completing the required steps, you can upload a photo to show Head Office that you have set up the Visual Merchandising. Scan the QR code by hovering a camera over it, ensuring the entire square is in the frame (you do not need to take a photo). A link will appear on your screen, which, once clicked, will take you to a webpage. Tap 'Select Images', and follow the prompts to upload a photo. The below example is on an iPhone.

Once you have uploaded a photo, it will immediately update on the Connect platform, and will be shown in the VM activity popup window.
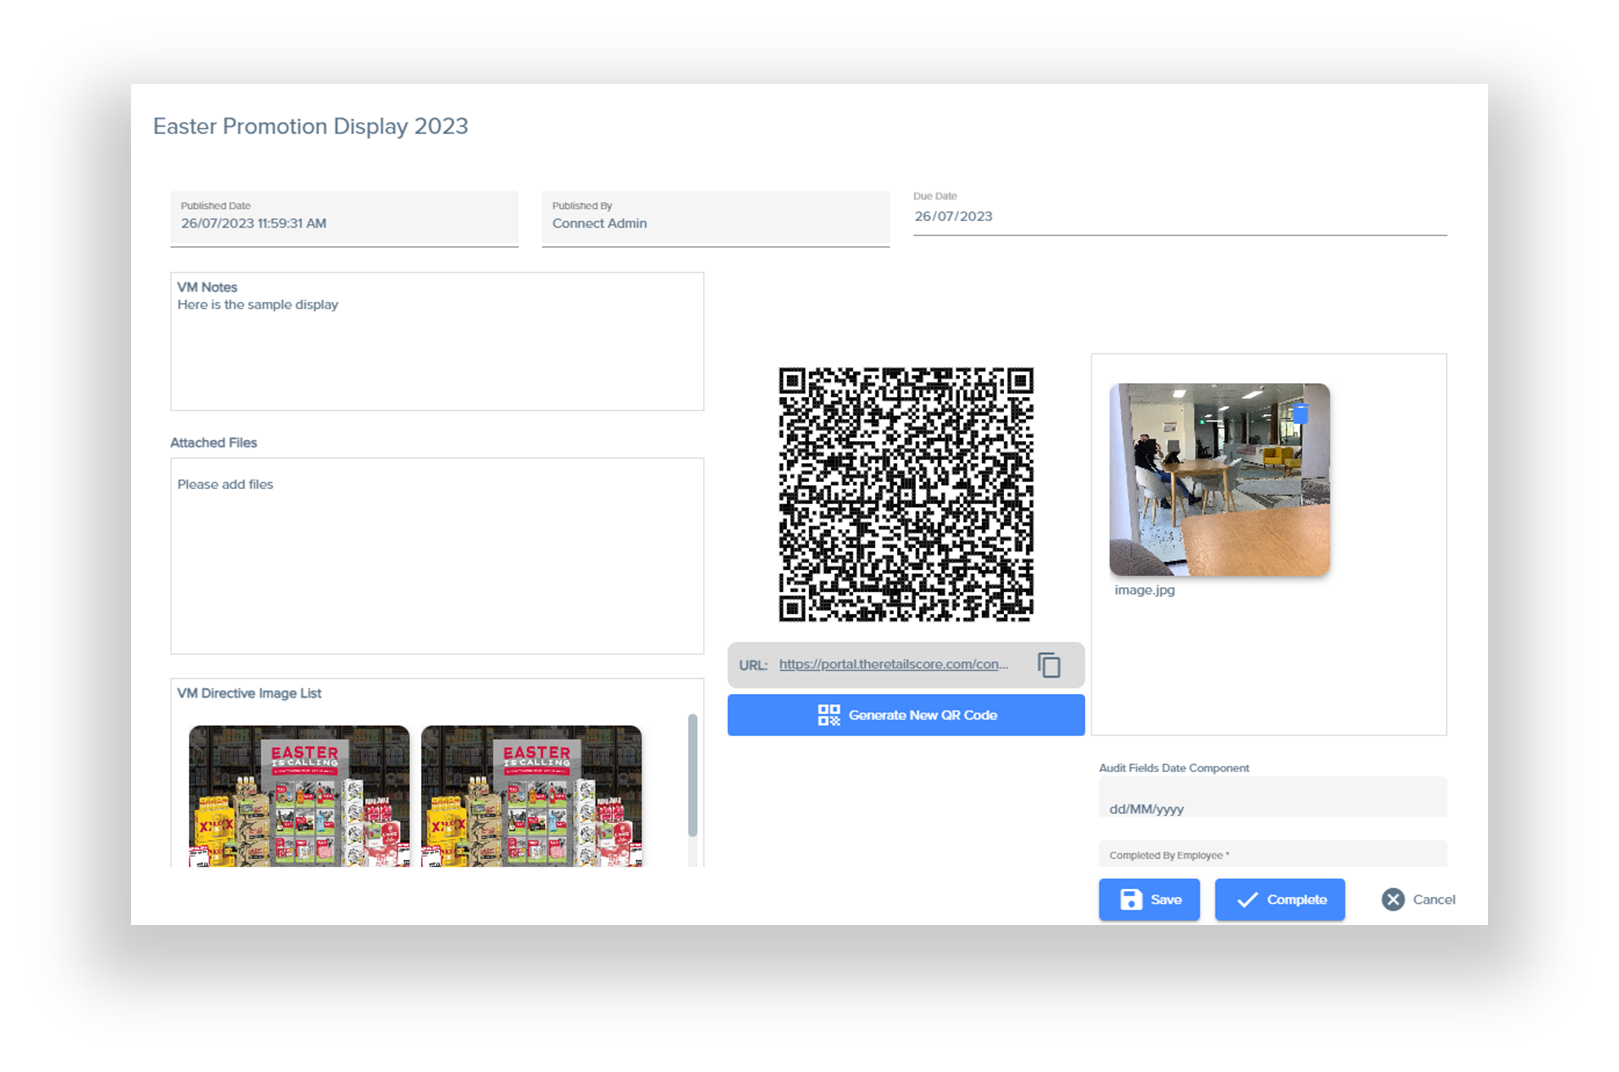
Then, simply fill out the employee who completed the Visual Merchandising Directive, click Save, and then click Complete to submit this to Head Office, and signify that your Store has set up the required Visual Merchandising.
How do I make a Store Note?
At the top of the Store Note tile, click the "+" button.

Select the following template.

This will take you to the following popup window.
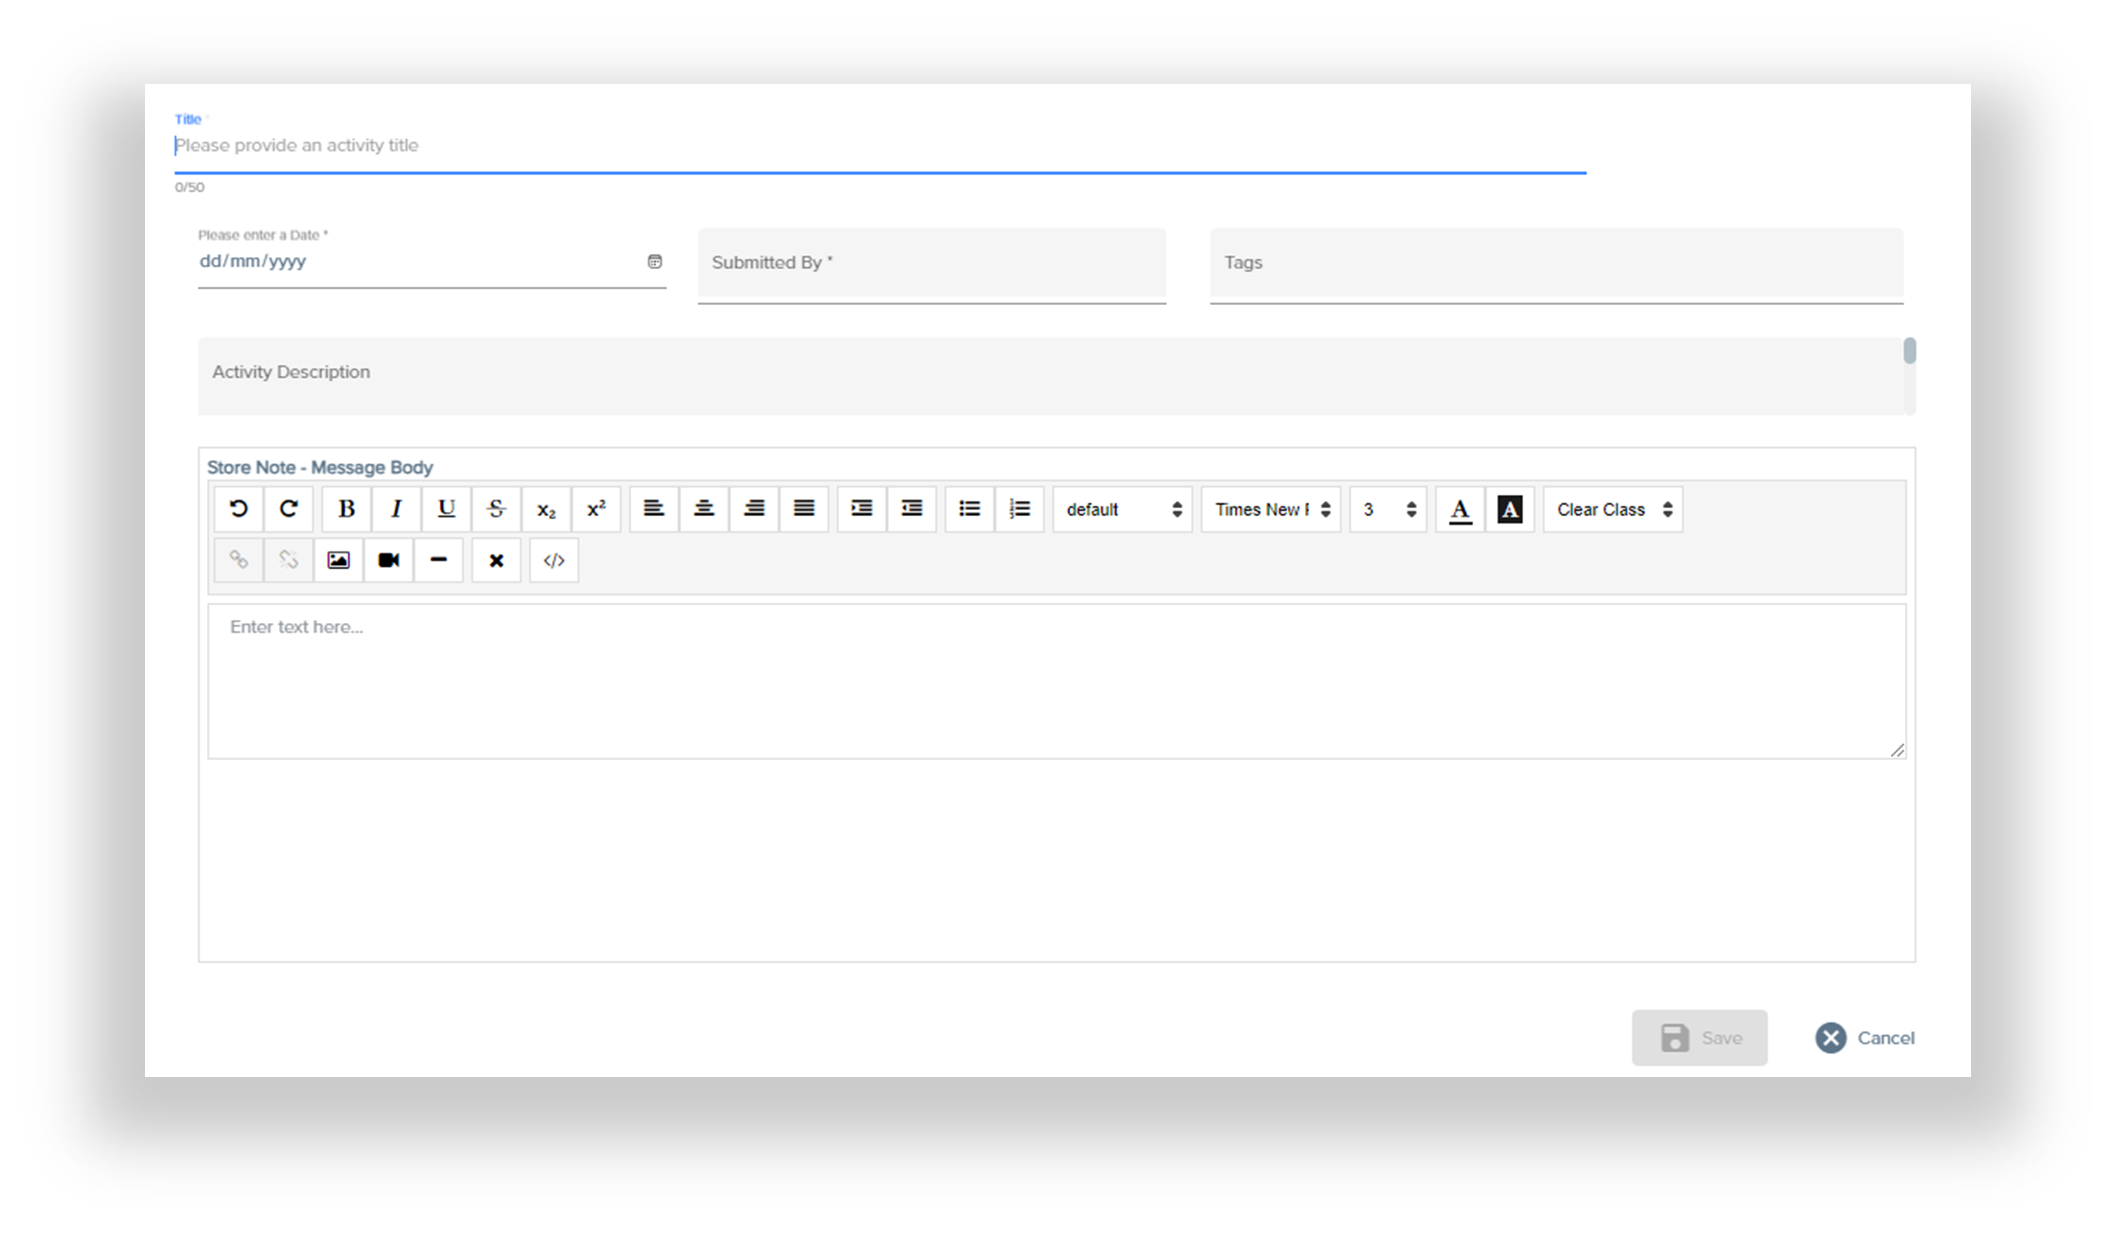
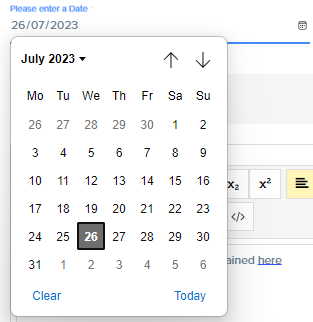
After typing the title of your Store Note, select a date for it by either typing it in this text field, or clicking the calendar icon to open the calendar selector.
Then, type in who is creating the note in the "Submitted By" text field. You can then add a Tag to the Store Note by selecting an option from the dropdown menu.

You may then add a Store Note Description and add details to the message body in the relevant text fields.
Once this is done, click Save, and it will add the Store Note to the Store Note tile. This will be visible and editable by everyone within your Store.

How do I change to light or dark mode?
In the top right corner of your Dashboard, you will see a panel of buttons.

Click the moon on the leftmost button to change to dark mode. Once in dark mode, you can click the sun in the same location to switch back to light mode.

Use this button to toggle between light and dark modes for your Dashboard.

How is my compliance measured?
Coming soon!